The Unreal Static Mesh Audio Emitters is an Unreal Editor Utility Widget that helps tech sound designers automatically place point audio emitters on static meshes in an Unreal level.
The tool iterates over all objects in the currently opened level and checks every static mesh. If it finds it in a list we provide, the tool will spawn an appropriate audio emitter actor at the same location and set its relevant audio data (which sound to play).
The Audio Emitter Actors will also remember which static mesh they were tied to and its location at the moment of spawning. That means that if the level changes, the tool will be able to report any audio emitters that need updating to reflect this change.
It has been tested on Unreal Engine 5.7.
The Unreal Footsteps and Foley auto-tagging is part of the Unreal Tech Audio Toolkit plugin, so follow the installation instructions there.
Through the Unreal Tech Audio Toolkit plugin window, open the Static Mesh Audio Emitters.
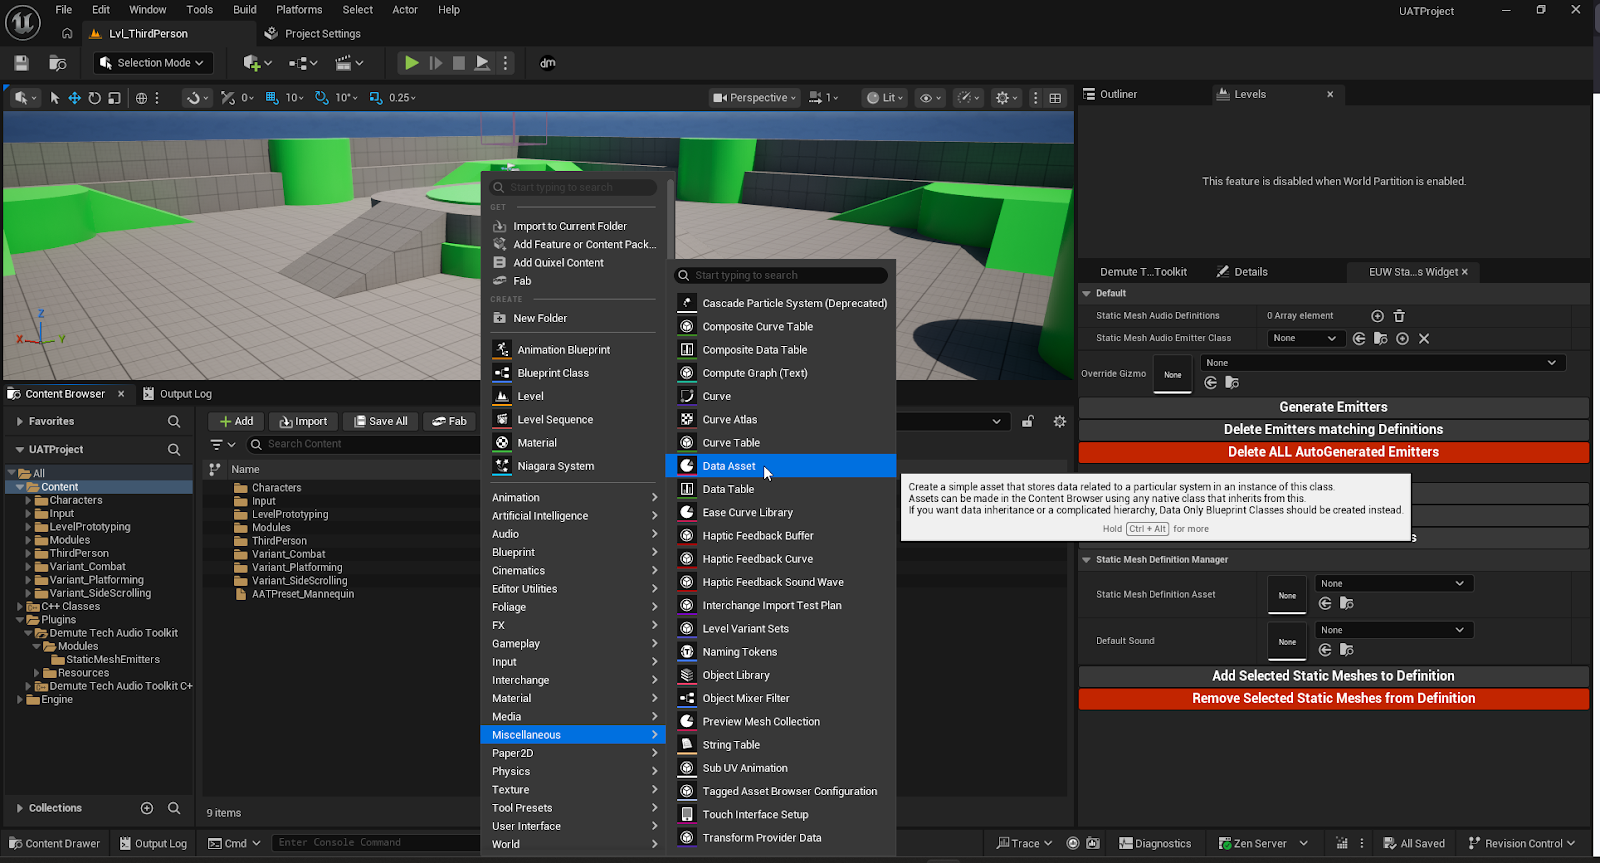
To begin, we need to list all the static mesh emitters where we want to add an audio emitter. This info is created in a data asset of type StaticMeshAudioDefinitions_BP. We need to create at least one of these and start populating it. You can create one by right clicking in the Content Browser and selecting Miscellaneous/Data Asset then choosing StaticMeshAudioDefinitions_BP.

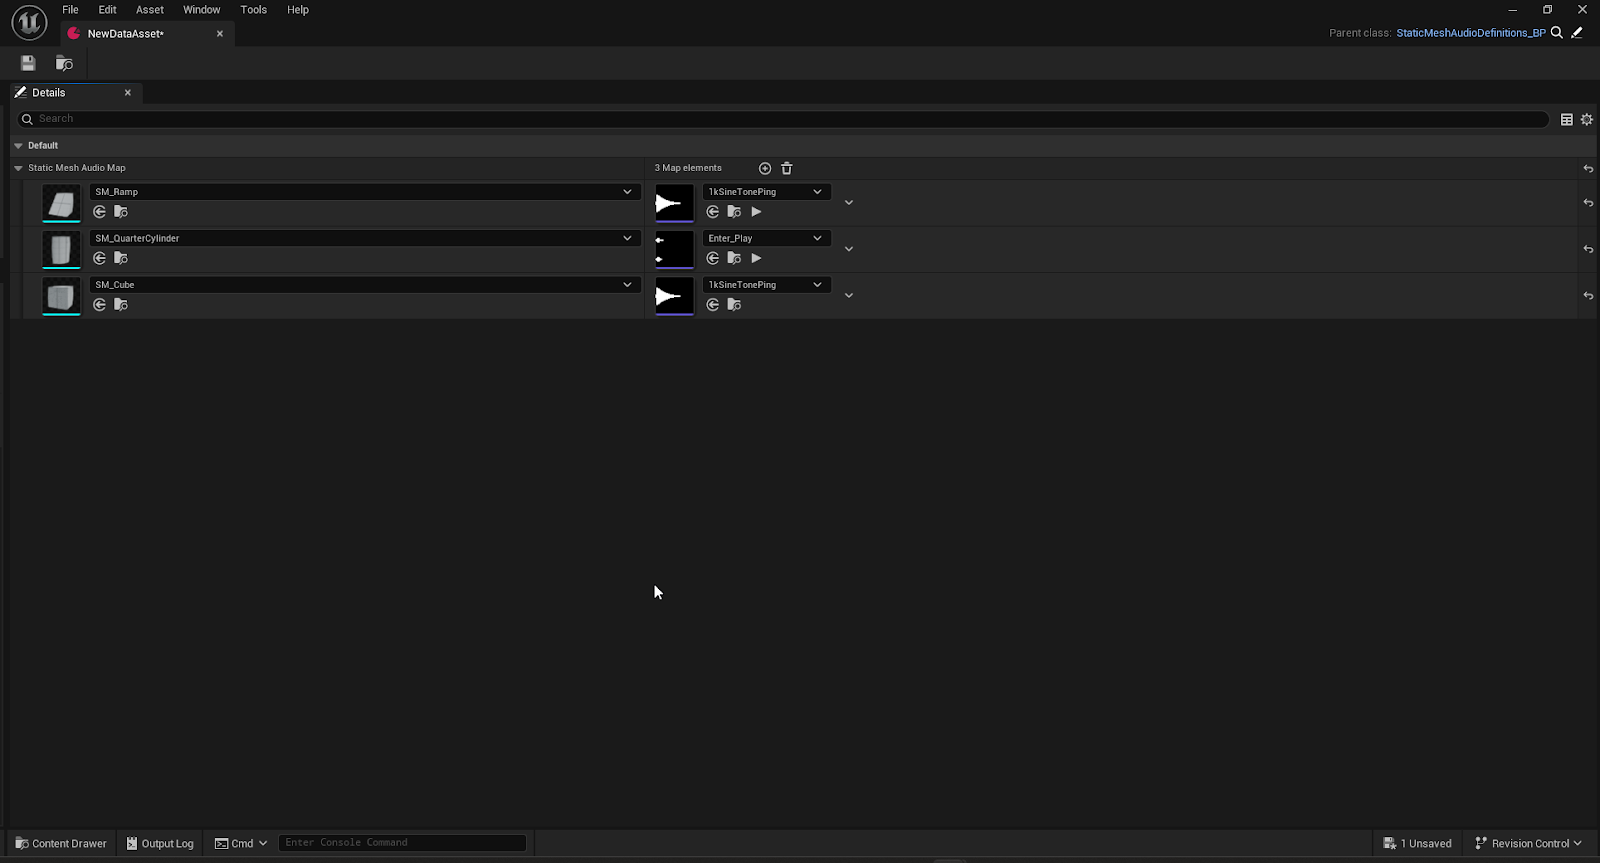
The data asset simply contains a map that links a static mesh to a Sound Base (Sound Cue or Metasound Source). You can add an entry for every static mesh you want to detect and then specify which Sound Base will be played at that location.
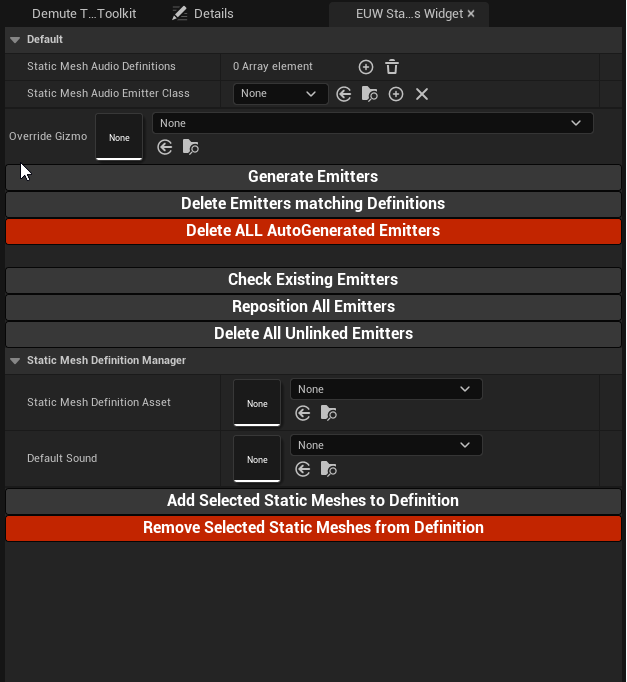
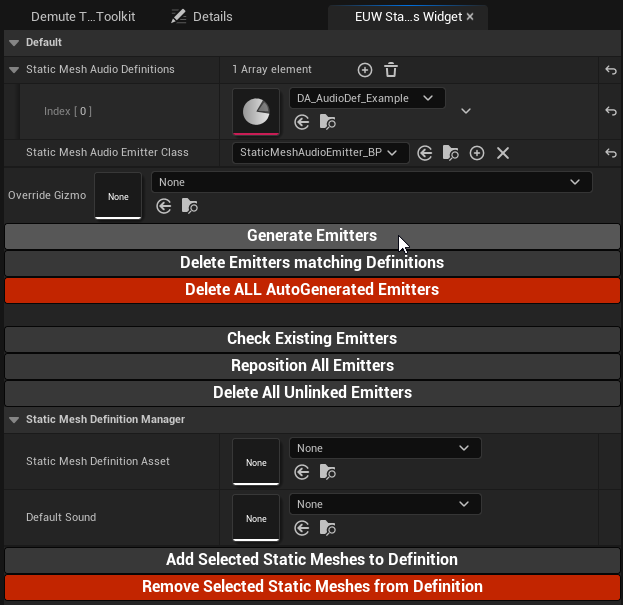
Now we can go back to our widget and add that new data asset in the list of Static Mesh Audio Definitions.
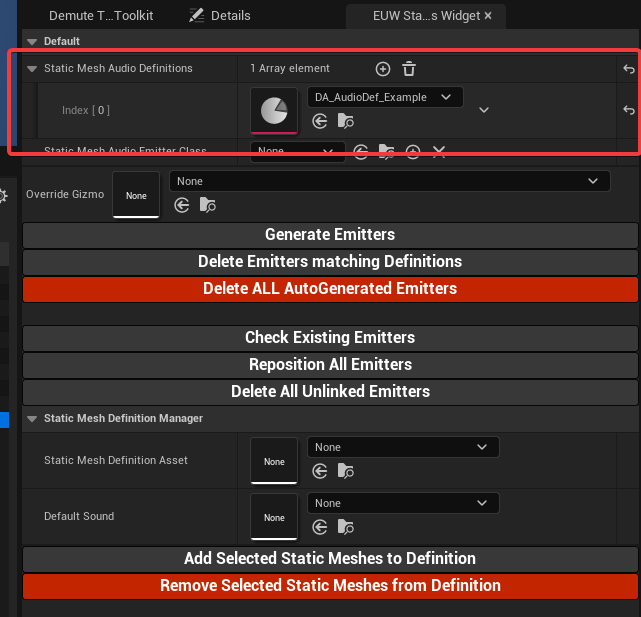
Then we need to specify which Actor Class to use for our audio emitters. The tool comes with a basic StaticMeshAudioEmitter_BP that you can use that will simply play the sound cue on Begin Play, so we’ll use this one for now.
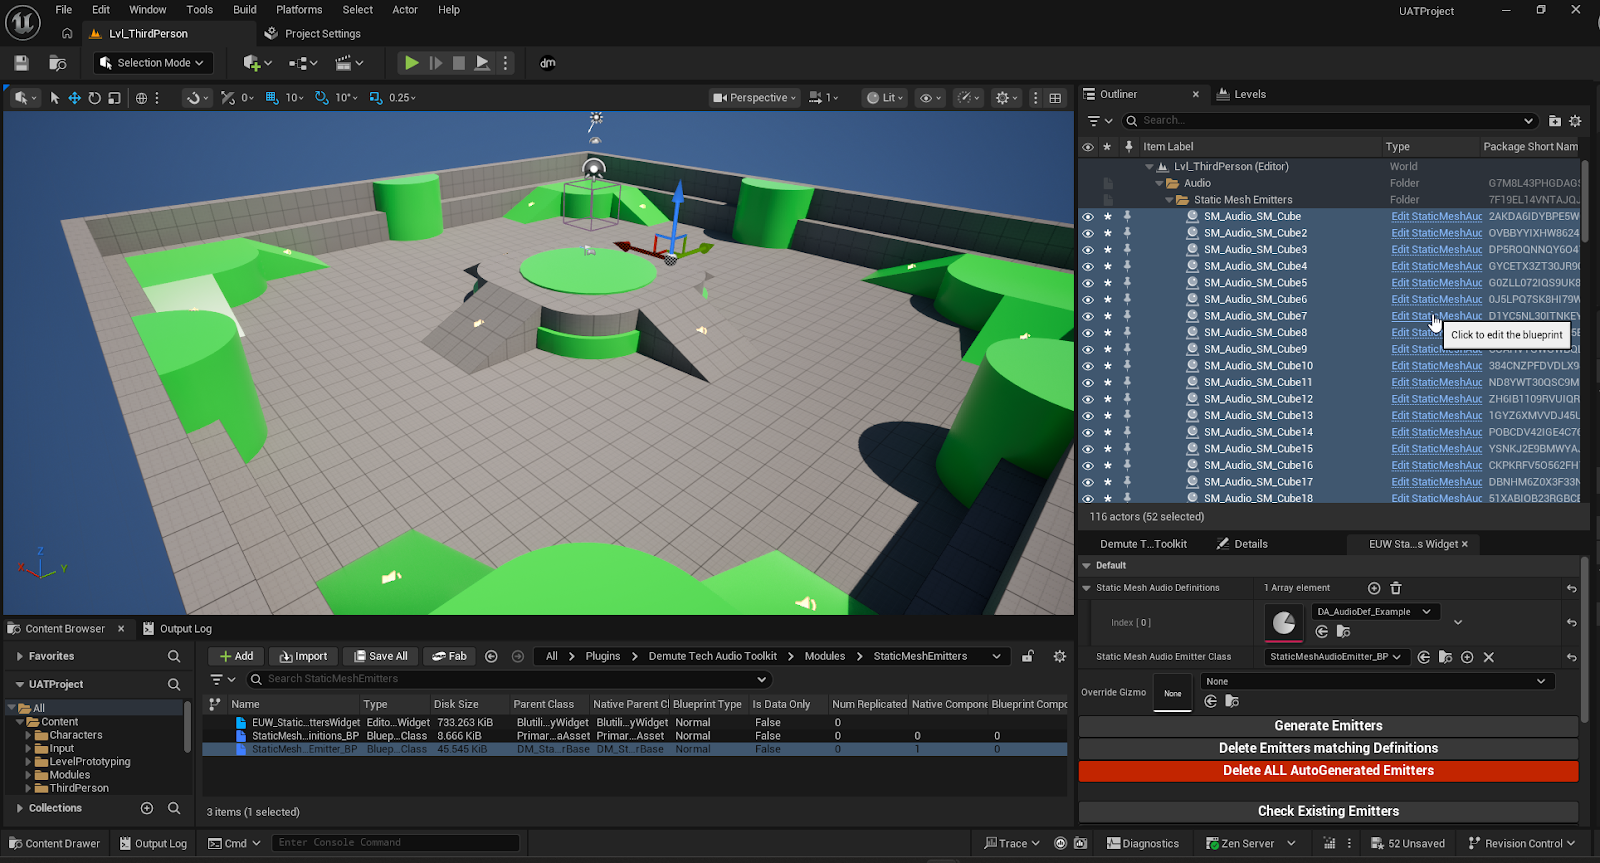
Finally, we press on Generate Emitters to spawn the audio emitters.
You should now see in your level all the audio emitters that were generated by the tool on every static mesh that was included in your audio definition.
Manually adding static meshes to the data assets can be a lot of clicks. You’ll see on the lower part of the widget a Static Mesh Definition Manager.
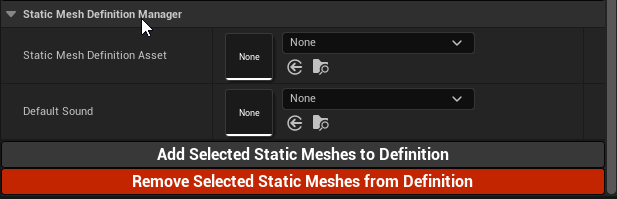
This part lets you easily add or remove many static meshes in one click. Choose the data asset you want to edit and select a sound to associate to all the static meshes added. Then navigate to the static meshes you want to add in your content browser, select them, and click on Add Selected Static Meshes to Definition.
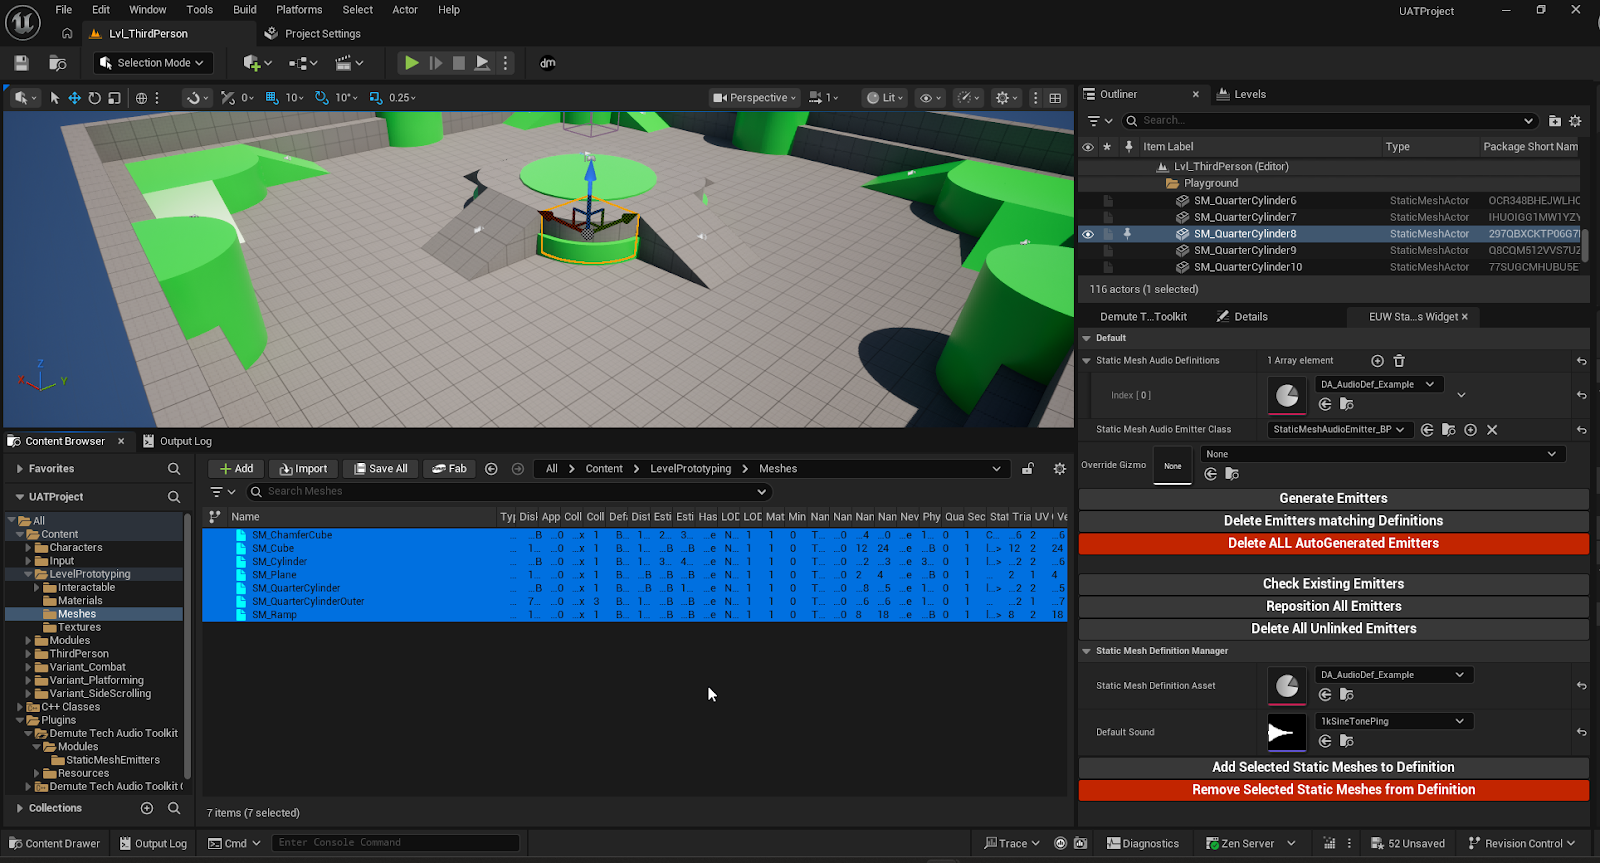
This will populate your data asset with an entry for each of the selected static meshes and the sound you set in the widget.
If you want to batch remove entries, you can use the Remove Selected Static Meshes from Definition in the same way.
If you want to quickly see if any static meshes moved since you generated the audio emitters, you can click on Check Existing Emitters. The tool will list any inconsistencies it finds in the level.
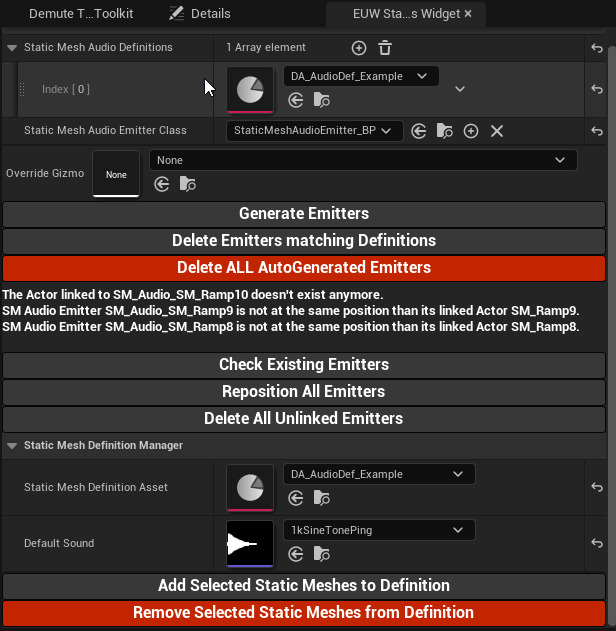
You can then easily act on those changes. Reposition All Emitters will move the audio emitters to the new location of the static mesh it is tied to. Delete All Unlinked Emitters will delete all the audio emitters whose static mesh doesn’t exist anymore.
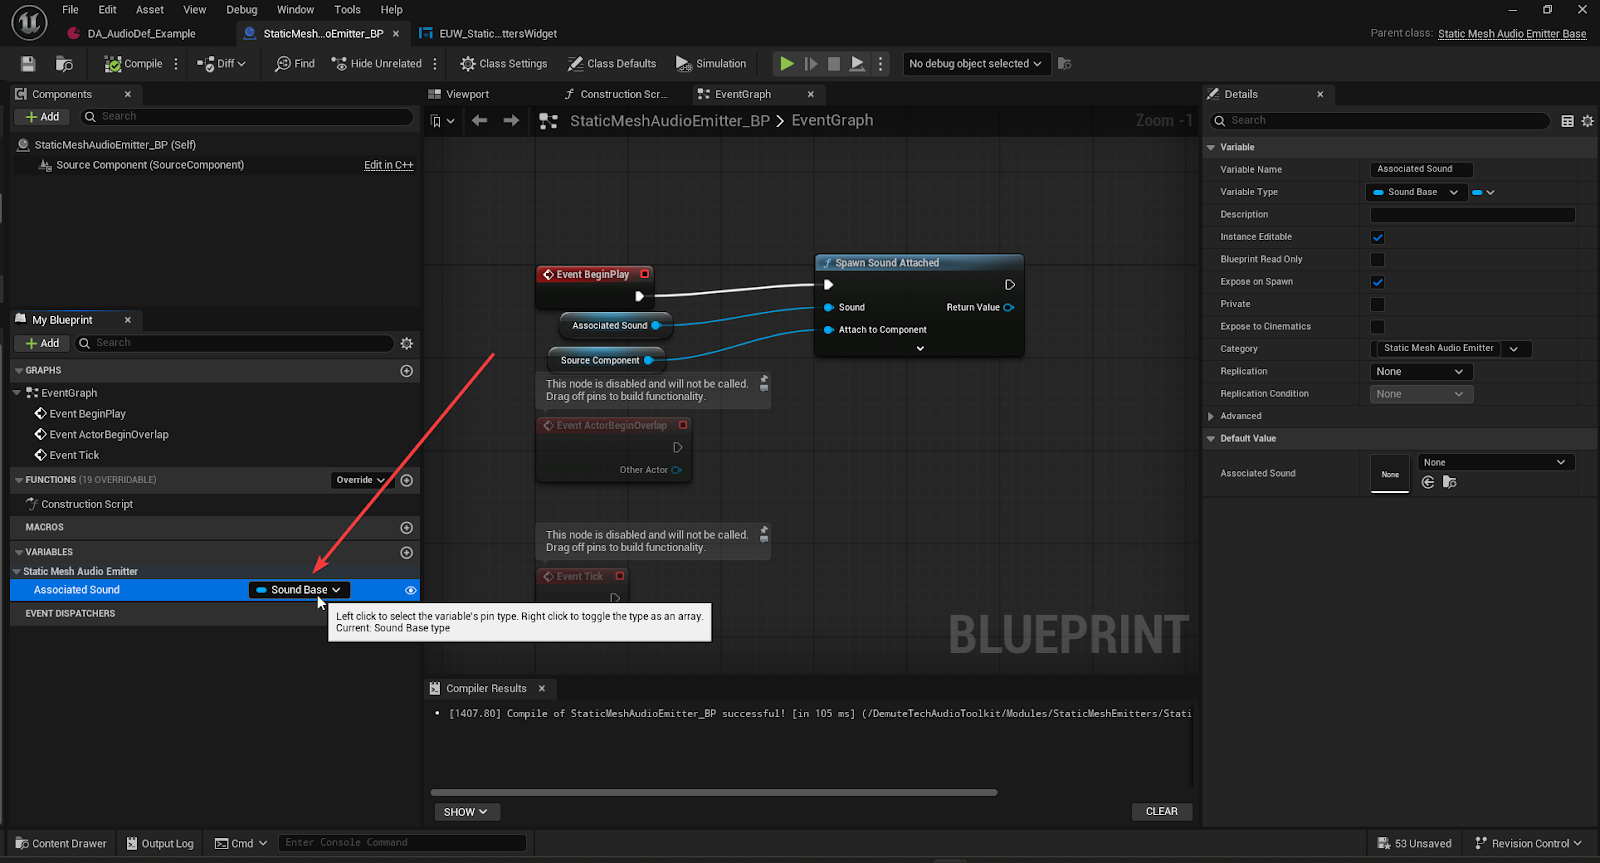
The base audio emitter actor is going to play its sound on Begin Play without any optimization consideration. However, because every game might have different optimization strategies, we preferred to simply make it easy to change the Actor Class and let each team decide how to play the sound. By creating a new Blueprint that derives from StaticMeshAudioEmitter_BP, you can create your own audio emitter actor blueprint and use it for the audio emitter generation. The Blueprint will have a Sound Base variable called Associated Sound that you can use to play sound when and how it feels appropriate for your situation.
If you are using other types of audio assets (like AkAudioEvents in Wwise), you will need to change some blueprints for the tool to work. We might make it a bit easier in the future but for now the process would be :
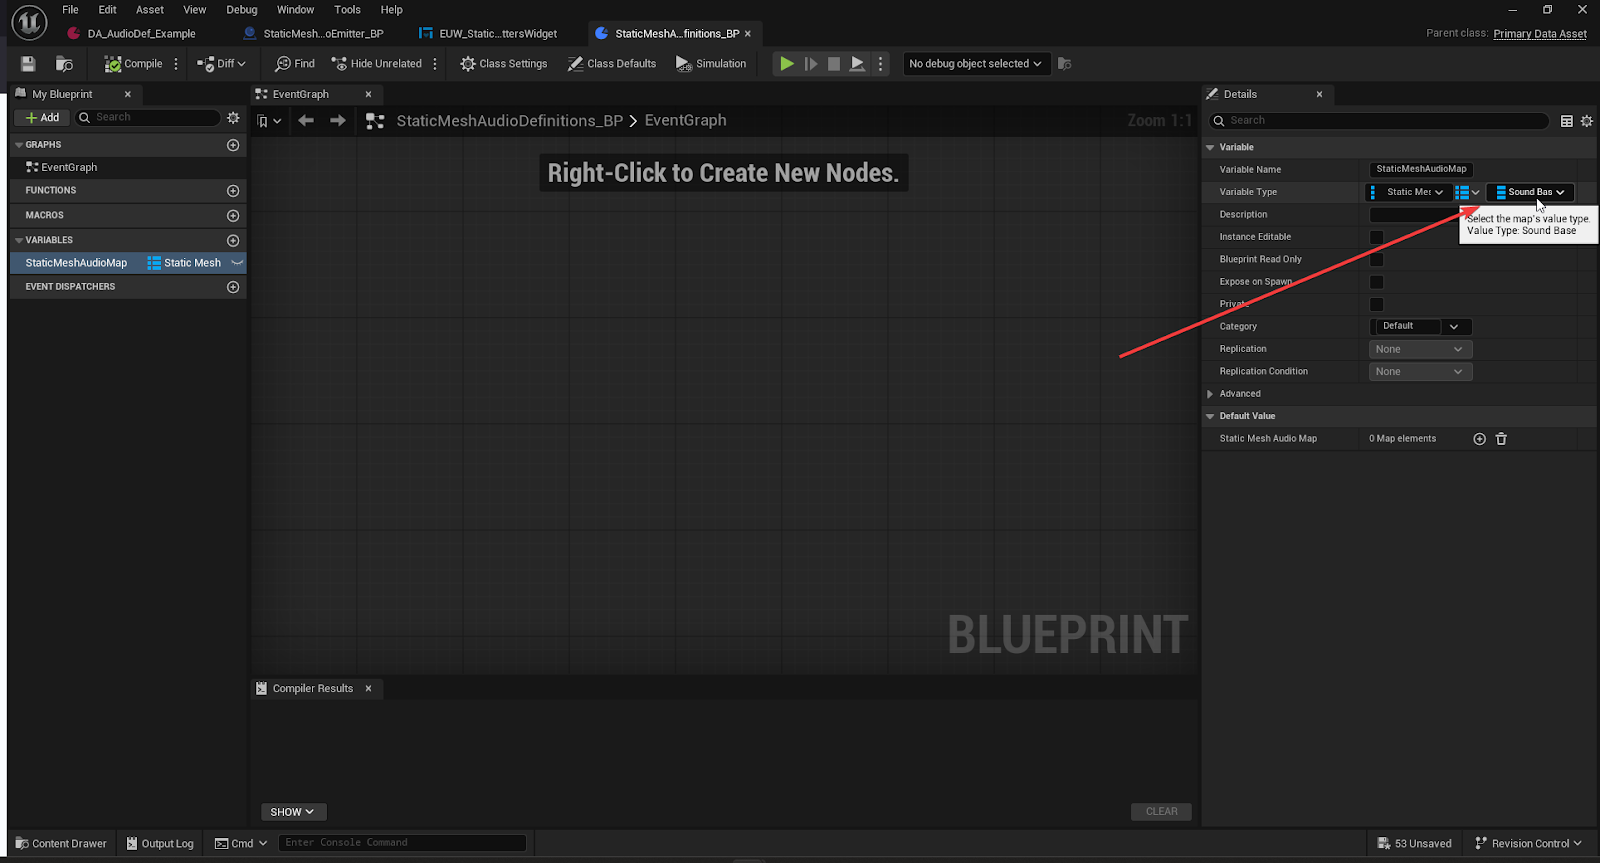
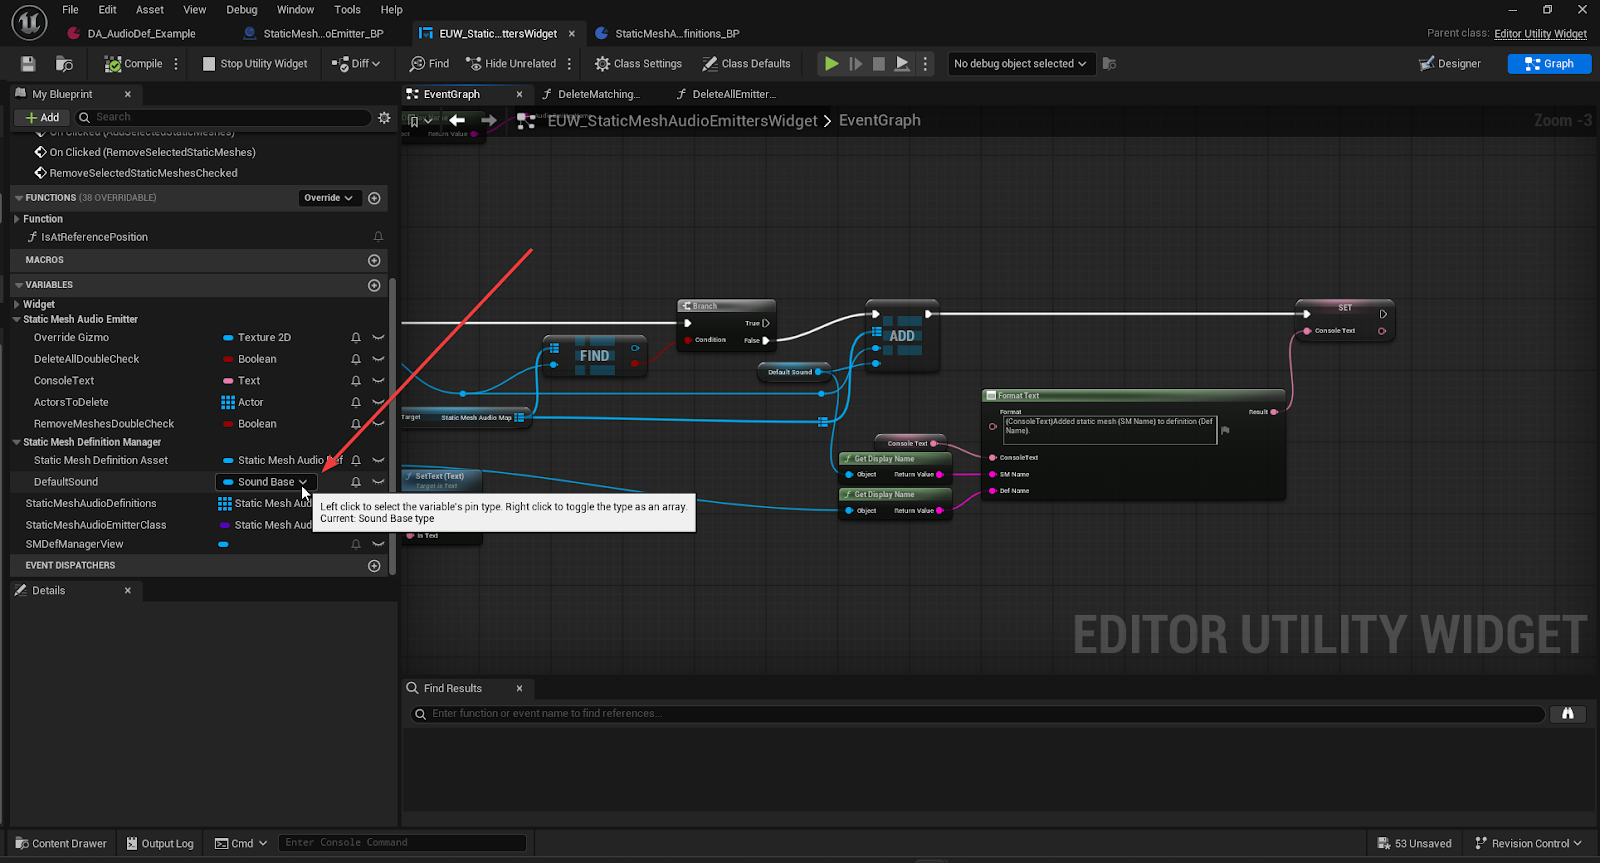
This should let you now use this new type of audio asset in the static mesh audio emitters tool.
1.0 - Initial version