Surface Detector plugin strongly benefits from being used in conjunction with the Audio Animation Tool. This guide will cover the usage of the Surface Detector both in combination and without the Audio Animation Tool.
To use the Surface Detector plugin effectively, the user must set up a few things.

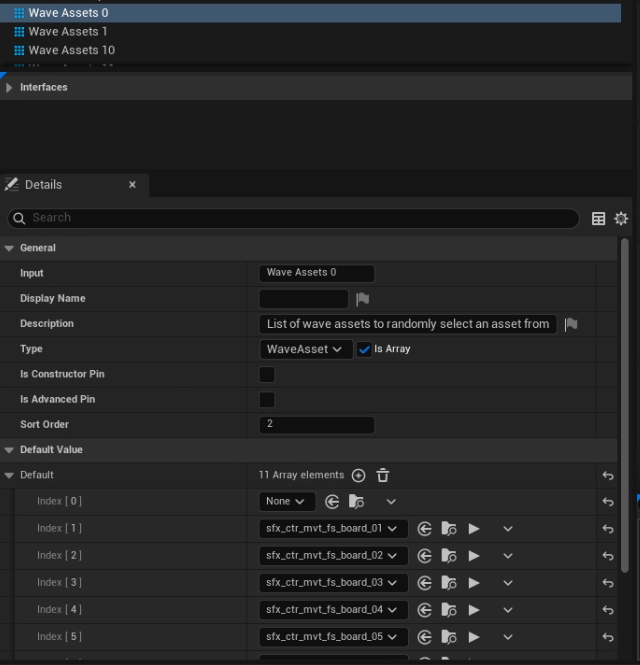
Remember: by default, the 0 value of your Metasound will represent the first “Default” value in your Project Settings’ Surface Type list. For the other values, index 1 in the Project Settings list will be associated with index 1 in Metasound, and so on.
For example, let's say your project has surfaces of wood, stone and metal in that order. You would set that up as wave assets 1 having the wood assets, wave assets 2 having the stone assets and wave assets 3 having the metal assets. Finally, you would need to add the default sounds to use when the surface has none of these 3 materials (imagine the level designer just added a new sand environment). These default sounds would be in wave assets 0 and you could use the wood assets for example. This means that whenever we trigger the notify on an unknown surface, we would hear the wood assets.
If you’d like binding to occur differently, so that two different index values are associated with each other, please refer to the Audio Surface Data Asset section of this document.
For example, something like the following needs to be set up:
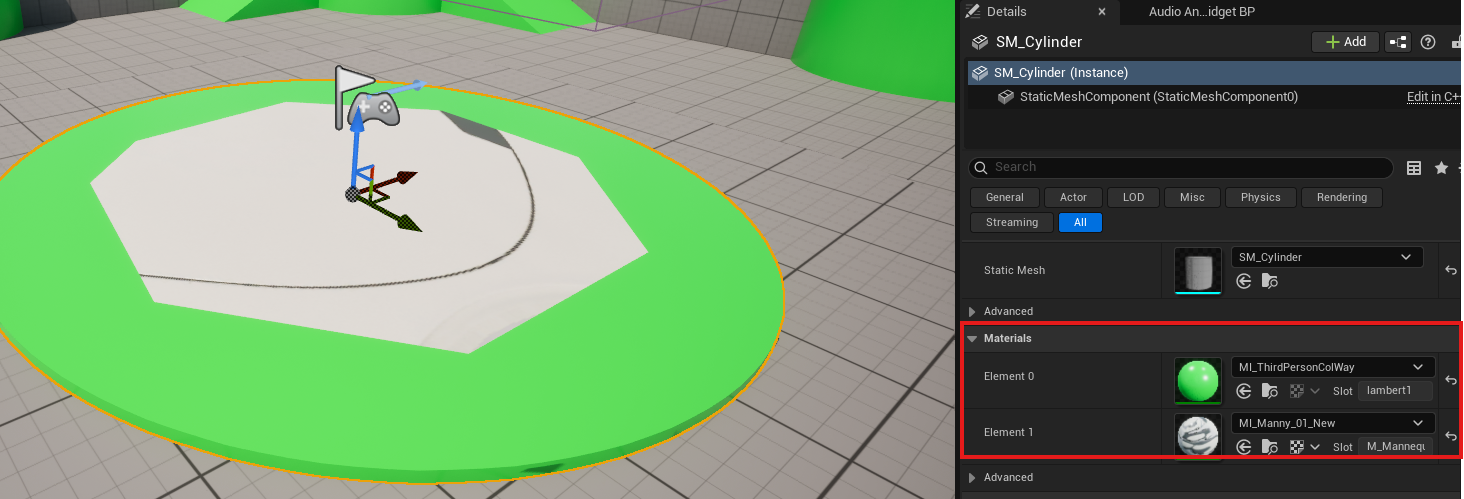
Actors have one or more materials assigned to them:
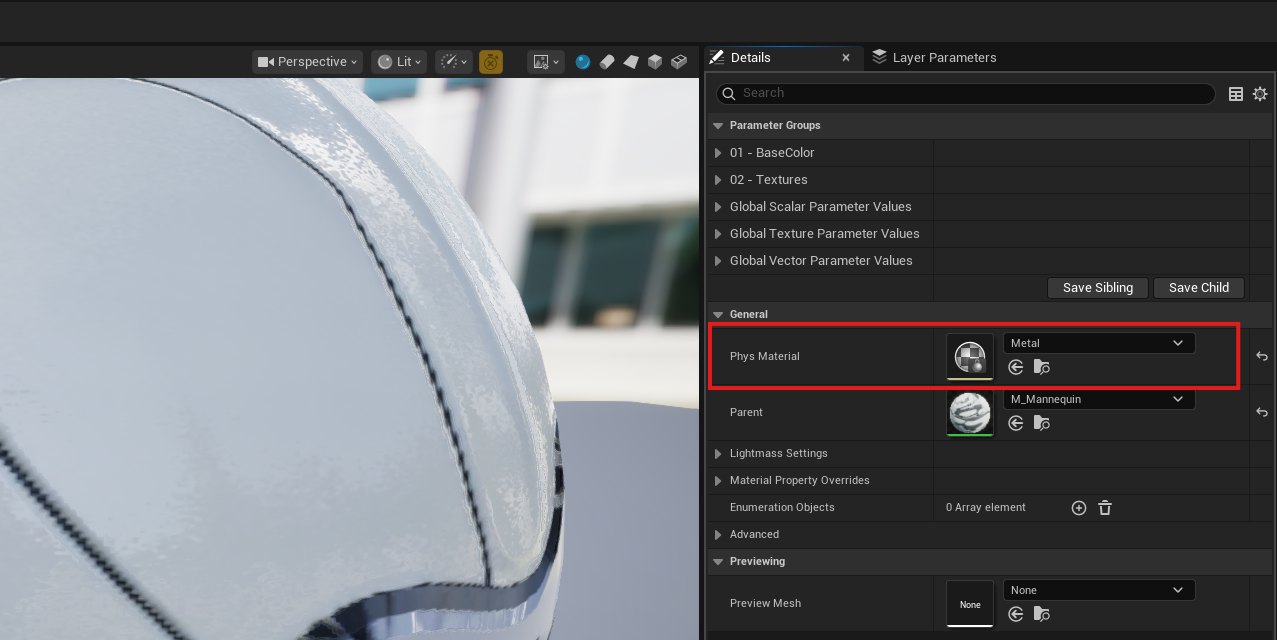
Granted that you have created a Physical Material asset somewhere in your project, by opening a Material asset, you can assign a Physical Material:
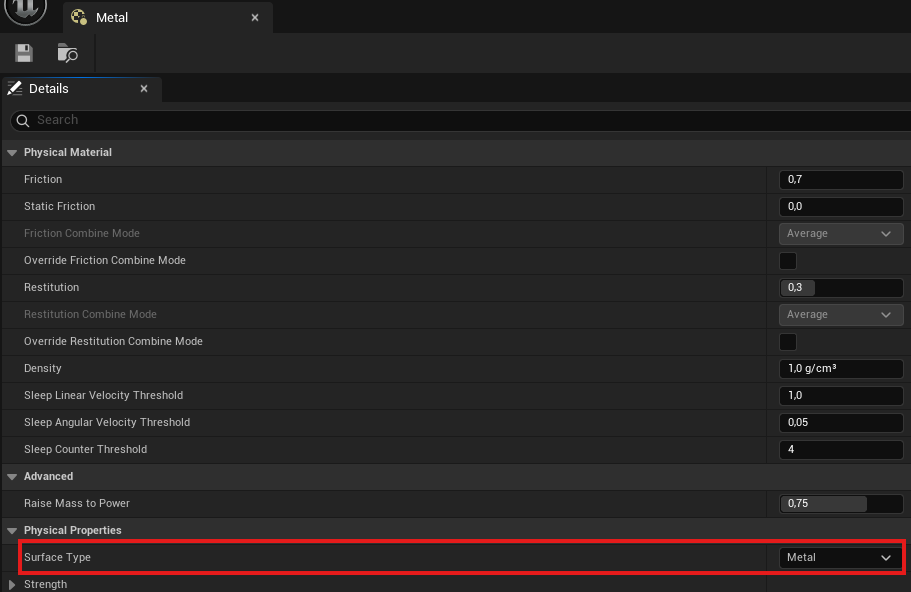
From the Physical Material details panel you can select the desired Surface Type for the given material:
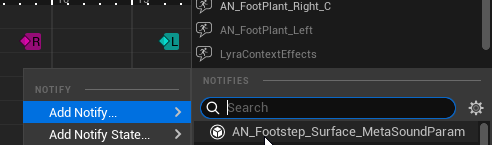
Then, assign the corresponding metasound to the animation notify in the details panel:
If you want to use the Surface Detector in combination with the Audio Animation Tool, make sure to import the Audio Animation Tool into your project. Please refer to the Audio Animation Tool’s documentation to get it working in your project.
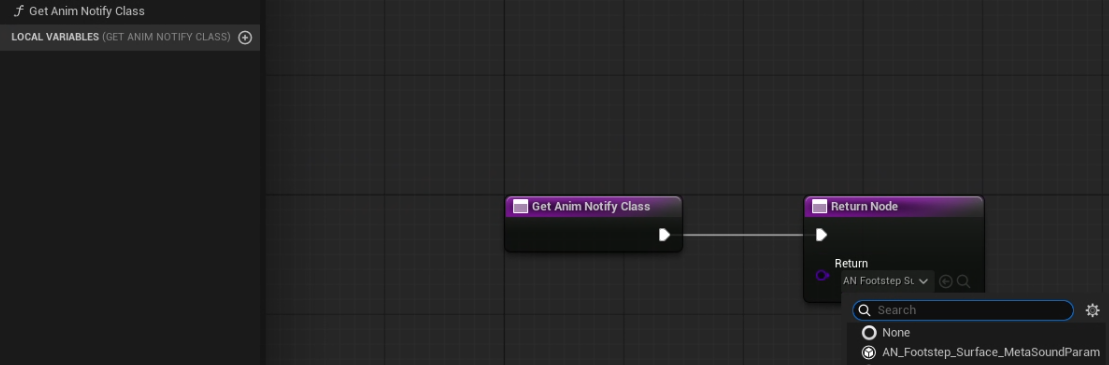
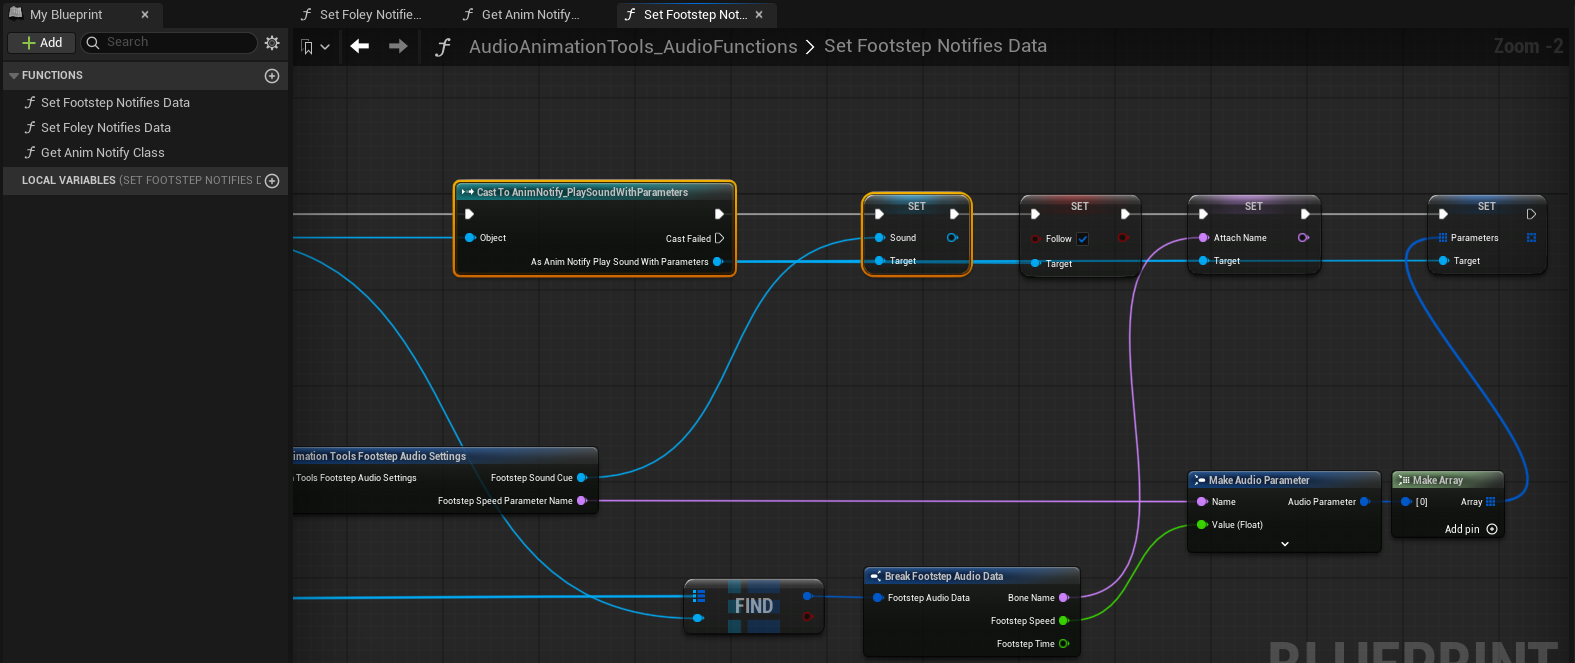
Additionally, make sure to replace the animation notify cast in the Set Footstep Notifies Data function of this same blueprint.
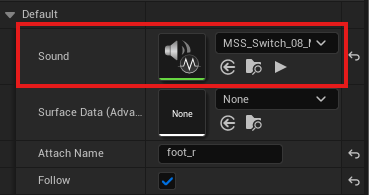
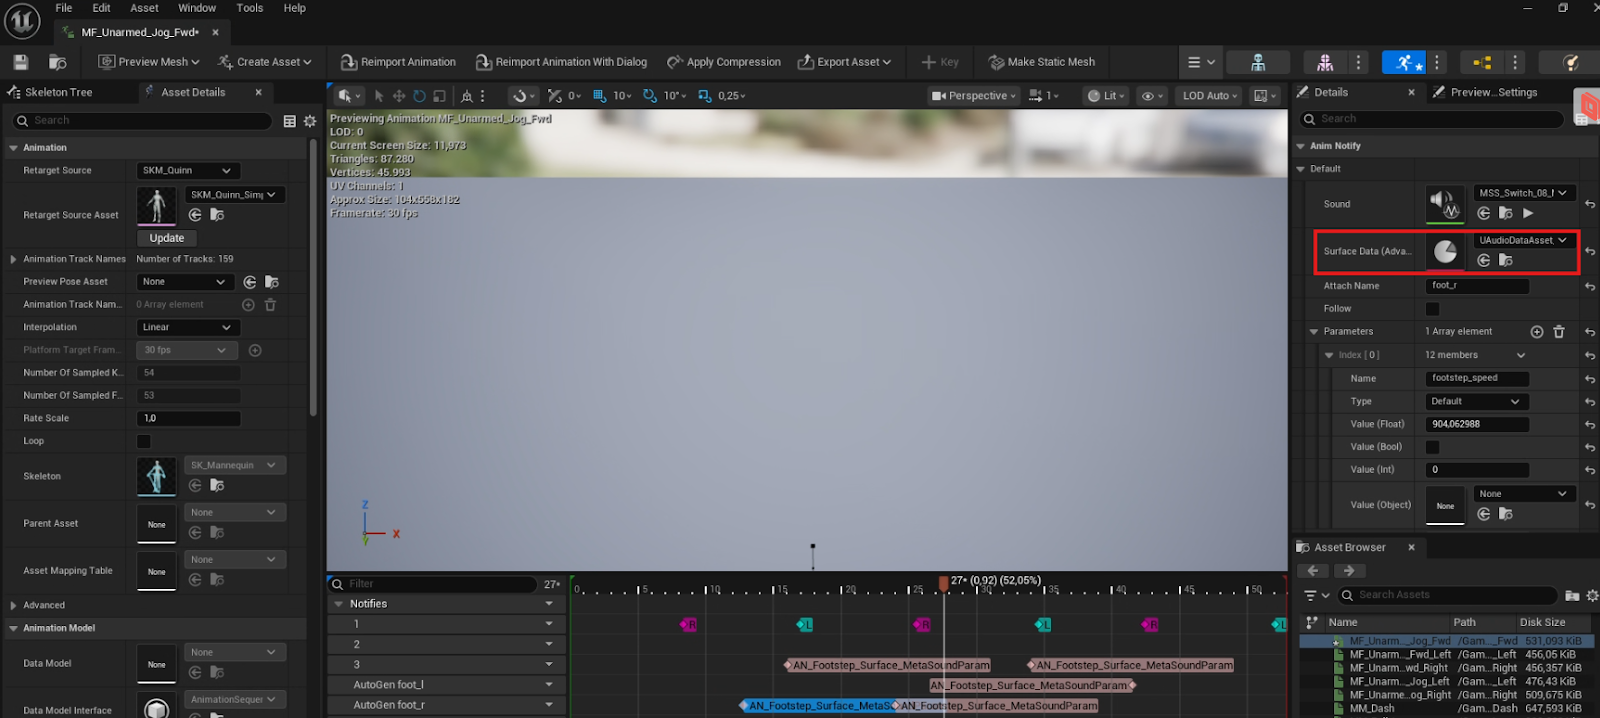
Make sure to set the sound, the follow, the attach name and the parameters for the AN_Footstep_Surface_MetaSoundParam notify. It should look like the following screenshot at the end:
The Audio Surface Data Asset is useful in case your metasound inputs structure doesn’t align precisely with the project settings order. You can manually reroute the parameter value of a given surface (including default) to the desired input of your metasound like this:

For example, imagine that your first input in the metasound is assigned to Wood, but Wood is actually the 4th element in your project settings. When the Wood surface type will be detected to the system it is going to be translated to an integer of value 4 which doesn’t correspond to Wood sounds in your metasound.
In this case you would specify that Wood needs to point to the first input (0) of your metasound.
An Audio Surface Data Asset example file can be found inside the Example folder of the Module.
You can set the Audio Surface Data Asset that you want to be used for the given animation notifies in their properties panel:
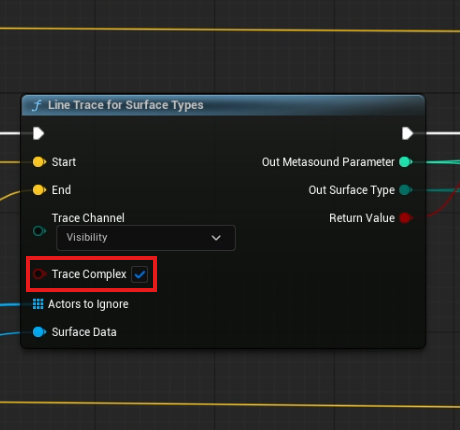
By default, complex tracing will be turned on. This means that characters walking on an actor that has multiple surface types assigned to it will play back the sound of the surface at the exact collision point detected by the line trace.
When complex tracing is turned off, the system iterates through all material slots on the hit component (Slot 0, Slot 1, etc.) and plays back the sound of the first valid surface type found. Note that Default is considered valid, but any other surface type will be preferred over Default when multiple surfaces exist on the same object.
To change this option, check or uncheck the “Trace Complex” checkbox in the Line Trace for Surface Types node inside the AN_Footstep_Surface_MetaSoundParam Blueprint.
The Surface Detection plugin comes with two different console commands that can help in visualizing the detected surface and filtering it for specific characters:
You can also filter the debug information for one or more actors in the game, adding their name after the previous commands, followed by “-solo”.
Examples:
DEMUTE.Debug.PrintFootstepMaterial 1: activates screen overlay for all actors.
DEMUTE.Debug.ClearFootstepDebugging: clears previous commands.
DEMUTE.Debug.PrintFootstepMaterial 3 BP_Player -solo: activates onscreen overlay and logging for specified actor.
DEMUTE.Debug.PrintFootstepMaterial 3 BP_Enemy -solo: activates onscreen overlay and logging for specified actor without removing previous actor.