REAHAPTIC is a package for Reaper that contains a collection of scripts that allows the creation, editing, exporting, and testing of haptic files all inside Reaper (currently focused on haptics for mobile) and comes with a mobile testing app called the Reahaptic Receiver that you can connect to reaper an immediately test your haptics.
We wanted to make haptic creation and testing for games as a sound designer as easy and efficient as possible. These were the goals for this project:


To install Reapack follow these steps:
If you have Reapack installed go to Extensions->Reapack->Import Repositories paste the following link there and press Ok. https://raw.githubusercontent.com/DemuteStudio/ReaHaptic/refs/heads/main/index.xml Then in Extensions->Reapack->Manage repositories you should see ReahapticScripts double click it and then press Install/update ReahapticScripts and choose Install all packages in this repository. It should Install without any errors.
To install ReaImGui, find ReaTeam Extensions in Manage repositories. Then if you only want ReaImGui Choose Install individual packages in this repository and find ReaImGui.
These Actions should appear in your action list
If you do not have all the actions check if you have python installed. If you didn't you will need to reinstall the package.
To easily use these actions I have included a toolbar that already contains all the actions required for haptic editing in reaper

You can load the toolbar by right clicking on your toolbar and select customize toolbar, then click import on the top right and go to the reaper recourse folder: …\AppData\Roaming\REAPER If you don’t know where your resource folder is go to Options >Show Reaper resource path in explorer/finder. there go to Data\MenuSets and select ReaperHapticsToolbar.ReaperMenu
We created a collection of reaper scripts that allow a workflow for haptic creation in reaper.
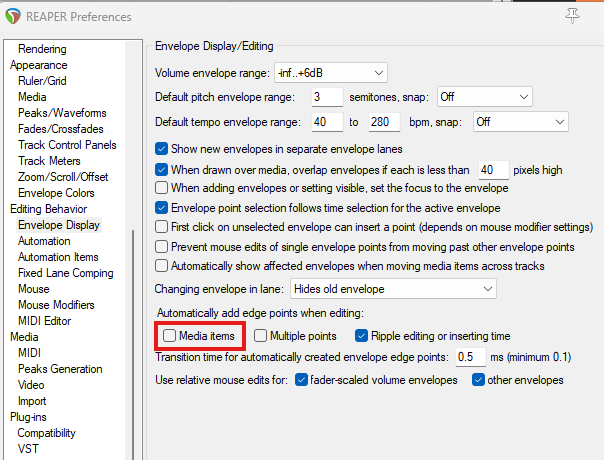
If it bothers you that when you move Empty Items the start point gets deleted you can turn off Preferences >Envelope Display >Automatically add edge points when editing >Toggle of Media Items
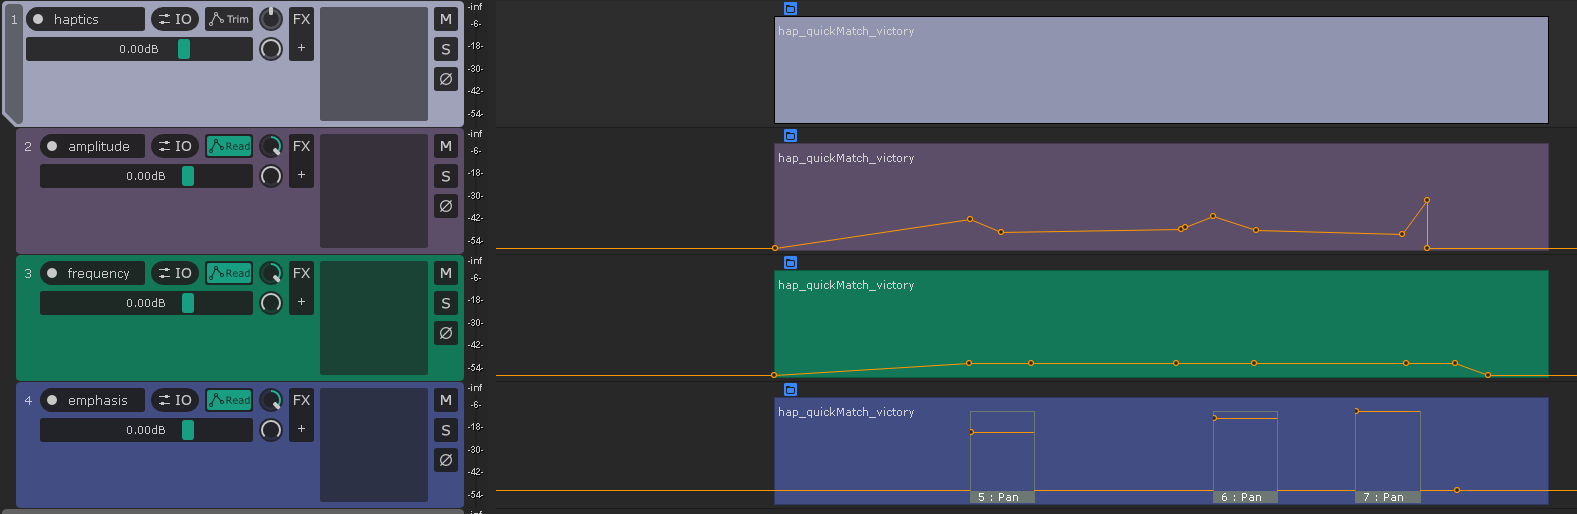
To visualise and allow the editing of haptics in Reaper we have 3 tracks that have an envelope that represent the haptic data. you can edit these envelopes by moving, adding or removing points.
For the amplitude and frequency envelope we edit them the same way, when you import or create a new haptic you will get empty media items that represent the haptic, for each of these there will be automatically two points created at the beginning and end of the item, you should not edit these. Then you can place new points in between to create your amplitude and frequency curve.
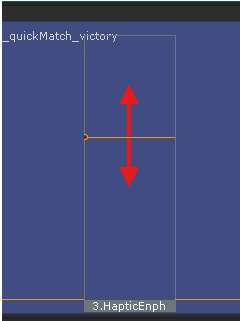
For the emphasis envelope the workflow is a bit different. In this envelope normal points will be ignored and we only look at automation items. You can easily create a emphasis automation Item at the cursor location by clicking the ReaHaptic_InsertEmphasis.py action. Each Emphasis automation Item has two parameters that you can change:
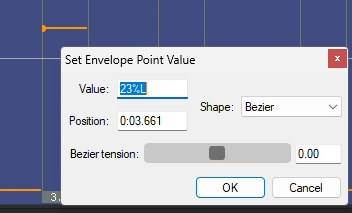
Both the Amplitude and the Frequency value get remapped. Even though you can set a negative tension it will be remapped to to a value between 0 and 1. Same for the Amplitude it uses the pan envelope so its left and right but it will also be remapped, so every value you can set is valid.
|
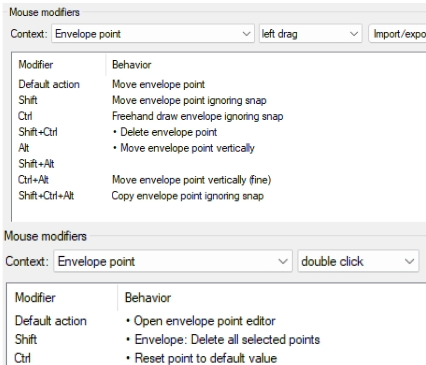
These mouse modifier settings work for me.
To create haptics for Gamepads you have to consider that they work a bit differently than mobile haptics and it can also differ from controller to controller. For example the xbox one controller has 2 motors, 1 for low frequency and 1 for high frequency. These motors only have amplitude modulation, no frequency modulation. So to translate our ampitude and frequency envelopes translate to this, we use the ampitude envelope to controll the amplitude of the low frequency motor and the frequency envelope to controll the high frequency motor.
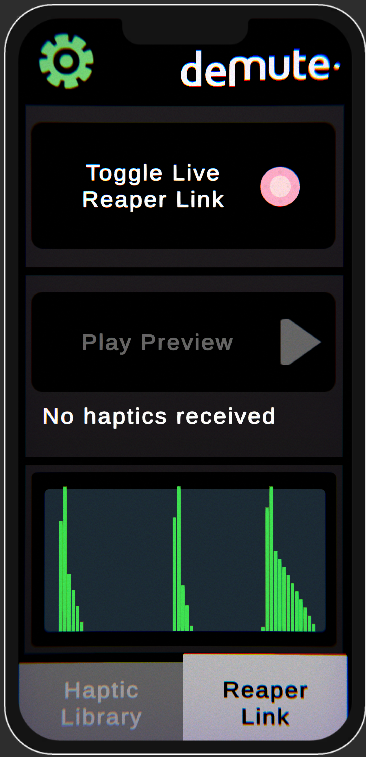
This app allows you to instantly test haptics that you made in Reaper on your phone. By running the ReaHaptic_LiveReaperLink script and enabling listening on the app, you will feel the haptics play on your phone when in reaper the cursor passes a haptic file. You can also send files directly to the app from Reaper and load haptic files with video reference from the file browser.
Install the ReahapticReceiver App on your phone (or run the build on Windows); to do this, check the iOS Installation or Android Installation sections. To be able to connect to your device, it needs to be on the same Wi-Fi network as your PC. Ensure your phone is not connected to a computer by USB to ensure you see the correct IP in the app.
To test your haptics, there are 3 important actions:
In the settings you can also switch wich haptic unity integration you want to use to play back the haptics.
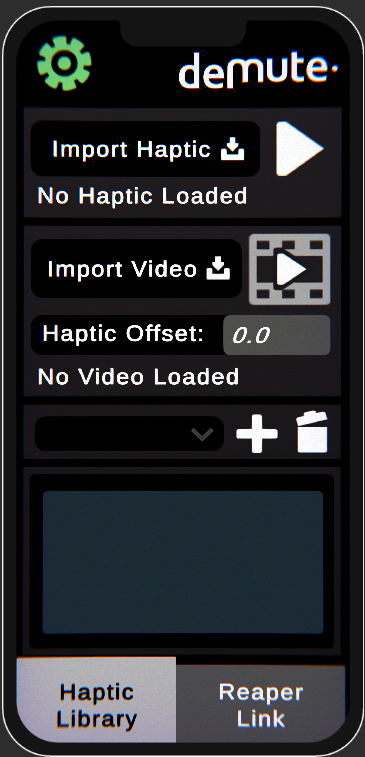
To load rendered files in the ReahapticReceiver app go to the Haptic Library tab. There you can Import a haptic file(supports .haptic and .haps) with the Import Haptic button and play it with the play icon. You can also import a refference video with the Import video button and set at what time the haptic should play with the Haptic Offset parameter.
You can save this preset(haptic + video + Haptic Offset) by clicking the plus button then it will appear in the dropdown alongside your other saved haptic-video presets. These presets reference the path of the haptic file so it will automaticaly have the latest version of the file when iterating.
Reahaptic supports multiple haptic files, We included some example files in the ExampleHaptics Folder:
To use the haptics receiver app on iOS you will need to build it yourself with Xcode. You can get the unity project here: Reahaptic Receiver After cloning the project you can build, make sure you have IOS as a platform. when you have built you can open it in xcode. make sure you have a xcode version that is compatible with the ios version you want to build for, you can check in the table here: xcode
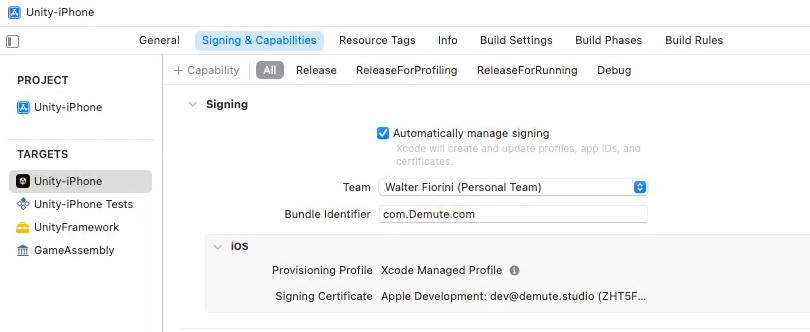
when you have opened the xcode project you need to select Unity-iPhone, there in "Signing and capabilities” you need to turn on Automatically manage signing. Select the team(if there is not one you need to create one) and change the name of the bundle identifier. Then select "unity-iPhone Test" and "UnityFramework" and change the team (not the identifier). Then you should be ready to build, connect your Iphone to your mac by cable (without adapters, needs to be directly to the mac) and select it in xcode at the top. in the Iphone you need to turn on developer mode. then you should be able to press the play shaped button to build, it will first build, if it succeeded it will try to install the app on your Iphone. your Iphone needs to be unlocked and you need to trust the account in Settings->General->VPN & Device Management-> Select your developer account and select trust. Then your app should Install and appear on your screen.
you can find the latest .apk in the Releases: folder download it on your android phone and install it. Note that on android phones the quality of haptics can vary a lot. A lot of android phones especially older or cheaper ones do not have the ability to play advanced haptics. Meaning that on each android phone the haptics you created can feel different as they use different hardware. Here is an interesting article from Hapticlabs if you want more information about how haptics work in different phones: https://www.hapticlabs.io/showcase/haptics-in-our-smartphones
Find the latest build in the releases and download Windows.zip, unpack and run the .exe inside.